Welcome To Pilgrims and Pioneers!

After many years of researching my family geneaology I have been lucky enough to discover actual information about my relatives that lived in the Pilgrim Era and the Pioneer Era- while many people also have realtives from those eras- many do not know their names or where they lived- actually seeing the proof in print makes you much more aware of who they really were.
After discovering these relatives it of course made me curious to learn more about the eras that they lived in and what their lives were like as, the history I learned in grade school had long since been forgotten.
I decided to start this blog for others who are also interested in these eras.
Some of the information here will be actual facts about my realtives and some will be information about the eras in general that I have found on the web.
I hope you will enjoy traveling back in time with me!

Thursday, March 19, 2009

Vintage Green Mason Jars with Black Prim Lids

If you are looking for storage containers for your primitive home these vintage quart size blue/green Ball mason jars with black primitive lids are the perfect solution!They can be used to store pasta, sugar, flour, cereal or other food tiems.
In your primitive bathroom store cotton balls, qtips, soap balls.
They would also look great with rosehips or filled with prim fixins!
There are currently 4 available and can be purchased at http://www.theprimitiveemporium.ecrater.com/
UPDATE- 3/27/09- these jars have all been sold.
I will restock them the week of May 1st

Tuesday, March 17, 2009

Sponge Cake (1885)

This is a Sponge Cake recipe from 1885
When you see the ingredients in this cake you will know why the Pioneers had short lives!
INGREDIENTS:
10 eggs,
1 pound suger,
1/2 pound flour.
juice of half a lemon with the rind grated
DIRECTIONS:
Now the success lies in the beating of the eggs.
Two persons should beat them at least half an hour,
one beating the whites,one beating the yolks with
half the sugar added.
Next cut the yolks into the whites and stir in the
remainder of the sugar, flour and lemon juice and rind.
Bake in greased tins at 350 degrees 25-30 minutes.
When baked, spread over the cakes a wafer thickness
of icing.

Monday, March 16, 2009

Wouldn't it be nice....


to be here right now? I am so longing for Spring!

Sunday, March 15, 2009

The Circus is Coming to Town circa 1902


This is a vintage ad from the tampico Tornado newsapaper August 30, 1902. I am sure that circus caused a lot of excitement in that tiny town!

Saturday, March 14, 2009

Oh My! I made a Big Boo Boo!

About a year ago my email address changed. This happened reight after I had renewed my domain name for my website.
Today I went to make some additions to my website www.brandyannescandlesandprims.com
and I got a screen saying my domain was parked. At first I was puzzled & then I realized i had not changed my email address with the domain registry so, of course I did not get the renewal notices!
I have been thinking about changing the name of my website for some time now- if it ever going to happen now wold be the time to do it.
I really can not decide if I will change it or not so , stay tuned new name, old name it will be back up soon!

Wednesday, March 11, 2009

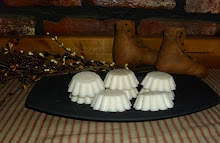
Milk Carton Candles

My Mom & Made candles similar to this when I was young. We did use the candle wicking but this seems easier.
You can easily use candle dye to color them.
The ones we made had holes where the ice was in the container- I can't tell from the photo
if these do or not but, be aware that the may have them.
If so they look wonderfully prim! You can also skip the glitter if you want a more primitive look!


What You Need:
Clean half-gallon cardboard milk carton
A pan and a large clean can
Broken ice
10-inch white taper candle
Large spoon
2-1/2 to 3 pounds of wax and 3/4 cup of stearin (to make the wax burn better) or use 2-1/2 to 3 pounds of wax or wax crystals with hardener already added
Candlemaking thermometer
Superfine glitter


Instructions:


1. Break the wax into chunks and place it in the can. Pour a few inches of water in the pan, then set the can of wax in the water. Bring the water to simmering and let the wax melt. (To make pouring the wax easier, you may wish to bend the can at the top to form a spout before putting the wax in.)
2. Add stearin to the melted wax. If you're using wax crystals or wax with hardener added, follow the manufacturer's instructions for melting.
3. Partially fill the milk carton with broken ice cubes. Center a taper in the milk carton, then continue filling the carton with ice. Tap the carton on your work surface to settle the ice, then add more ice. Sprinkle glitter over the ice.
4. Let the wax cool to 170 degrees F, then pour it into the carton. As the wax cools and shrinks, add more ice or wax to keep the top of the candle level.
5. After the wax hardens completely, peel the cardboard carton away from the sides. Trim the top of the taper so it's level with the top of the candle, leaving 1/2 inch of wick. If the bottom of the candle isn't level, slide it across an old warm skillet to smooth any rough spots.
Caution: Wax is extremely flammable. Never melt wax directly over heat or to a temperature above 220 degrees F. Never leave melting wax unattended; if it starts to smoke, remove the pan from the heat immediately. If wax catches fire, smother the flame with a pan lid; don't throw water on the flame. Never leave a burning candle unattended, and never burn candles where the flame might come in contact with flammable surfaces or objects.

Saturday, March 7, 2009

Please Take Our new Poll

It is posted on my other blog http://theprimitiveemporium.blogspot.com
Thanks so much!!

Get a Free 3/pk of Tarts


Get a free 3/pk of tarts with a purchase of 20.00 of more at http://www.brandyannescandlesandprims.com/ -

Use codeB23F- type your scent choice in the comment section of the order form- limited to scents on hand.

Tuesday, February 24, 2009

My Newest Shop!


This is a place where you can find some really great deals! These are a few things I have added already.


I will be adding more items on a regular basis so be sure to check often!


Pecan Pralines

Pecan Pralines (From an old Godchaux Sugar Refinery recipe book printed approx. 1879)
3 cups white sugar,1 cup light brown sugar,1-1/2 cups water,3 cups broken pecan meats (you can use halves; I prefer pieces),1 tblspn butter or margarine,1 tsp. vanilla
Place sugars and water in larger heavy pot. (I use as old heavy iron pot.) Bring to boil. When sugars are dissolved, add pecans. Turn heat down and allow mixture to gently simmer uncovered, stirring occasionally. Cook for approx. 15 -20 minutes..."until the mixture grains when metal spoon is rubbed against side of pot." (This is direct wording from original copy.) Remove from heat. Add margarine and vanilla. Stir mixture until it appears to granulate and adhere to the spoon. Drop by spoonfuls onto plain wax paper. Allow to cool beforeremoving and enjoy.
This is what pralines really tasted like in the 1800's. Most of today's pralines have milk in their recipes and are not the authentic taste. The Godchaux Sugar Refinery was an old company in New Orleans, LA. If you don't cook this long enough, put it back and cook longer. If you've cooked it too long and it gets hard before you've finished "dropping...", add a little more water and return to simmer once more. I've never ruined a batch...except by trying molasses! Nothing else will damage the recipe.

Vinyl Lettering Tutorial

Vinyl lettering is the newest craze in home décor. It’s easy to apply and can be completely customized to fit your home. Vinyl lettering can be applied to a number of surfaces such as wood, glass, walls, windows, tile, and metal. The options for vinyl lettering are endless. You can choose any quote, font, and color. Vinyl lettering works great for Super Saturday projects, craft nights, Girls Camp, and Young Women’s activities.
Vinyl lettering is similar to a rub on sticker. Before you apply the vinyl, be sure that the area you will be applying it to is clean and dry. If you have just painted a surface make sure the paint is dry before applying the vinyl. To make application easier, you can mark the application area with a pencil. One of the most common mistakes is not applying the lettering in a straight line. Marking the area will help you to avoid this mistake.
The lettering arrives on a piece of vinyl paper with application tape on top. Firmly rub the application tape with a hard surface such as a Popsicle stick, credit card or squeegee. To apply the lettering, slowly pull the application tape away from the paper. The vinyl will stick to the application tape. If your vinyl is not sticking to the application tape simply rub that area again. Once you have it where you want it gently rub over the tape with your hand to secure it in place, then use your hard surface (Popsicle stick, credit card or squeegee) and press firmly. Be sure to rub over the surface several times to insure the vinyl is secure. Then remove the application tape by slowly pull it off at an angle. If you have a letter that is staying on the tape then you once again rub the area that you are having a problem with. This should secure the vinyl to your surface.
To remove the vinyl from a surface, hold a hair dryer to the vinyl for about 20 seconds. The vinyl will then peel away from the surface without damaging anything. Because vinyl can be removed without any damage, you can put up vinyl for special occasions without worry.
Great ideas using vinyl lettering are generated every day, let us help you create something wonderful!
This would be great for making prim signs if you can not paint letters!

Sunday, February 22, 2009

A Little Info on PAD/PVD

Recently I posted about my son having surgery. He had a Peripheral artery bypass to counteract the damage of PAD. What is Pad? it is clogging of the arteries not inside the heart. This includes the arteries that supply blood flow to the legs. The name for this disease is Peripheral Artery Disease. It may also be called Pripheral Vascular Disease'

The main symptom of PAD/PVD is pain or numbness while walking- in the legs or buttock area. Usually the pain or numbness will subside when you stop walking.

The cause of this pain & numbness is lack of blood supply to the muscles.

If you have these symptoms you should seek medical attention. The test to diagnose PAD/PVD is not painful and takes less than an hour. PAD/PVD can lead to an increased risk of heart attack & stroke. If left untreated it can lead to Gangrene and leg amputation. It is so important to seek medical treatment if you think you may have PAD/PVD. The earlier the treatment the better the chance of lessening damage to your body.

Plavix is a drug used to help treat PAD. If you have been prescribed Plavix or it is prescribed for you in the future and you can not afford this medicine Astra- Zeneca- the makers of this drug has a compassionate program to help patients get this drug.http://www.astrazeneca-us.com/help-affording-your-medicines- there is an online application that you can print out to apply for their assistance.
If you are unemployed, uninsured or underinsured there are some places you can look for medical help.It may take a lot of searching to find them but you must search dilligently if you need help. Do not be ashamed to ask or apply for charity care and do not delay asking if you are sick or have symptoms of a medical problem. The person sitting next to you in a restaurant, or next to you in line at the grocery store may not be afraid to ask. With all the need there is in this country charity care may soon start dwindling- so do it as soon as you know you need it.
A good way to start searching is to use a search engine- Google is a very good one.
Search for "Charity Care- in your state. Example: charity care in Illinois
This should bring up some links for you to search with. Be wise about these sites. Never pay any one to give you links to Charity Care.
Another place to look is for teaching hospitals or medical universities in your state that have university hospitals- many of them provide charity care.
If you do not find any help there start looking for hospitals in big cities and towns with in your state. They are more likely to have the funds for charity care than smaller cities & towns.
Usually there are phone mumbers listed for these hospitals. You can usually get information on whether or not they have charity care by talking to someone in the billing department or social services department.
If you find a hospital or physician- most hospitals have a list of doctors that practice at their hospital- save the list as it usually has phone numbers listed for the doctors also. You will not only need a hospital to provide you with treatment but also a doctor to give you that treatment.
Also try contacting local Social Services in your area such as Salvation Army or Lutheran Social Services, etc. They may not be able to help you with medical costs but may know who can.
If you find medical treatment but need help with transportation contact local churches even if you don't go to church. They may be able to help you with that.
This is a very cruel world at times and many people will turn their back & walk away from those in need- but not everyone.
So if you do not find what you need at first don't give up- keep searching. It may not happen in a day or even two. Don't let that discourage you.
If you don't find help in your state try searching for help in states surrounding you. Sometimes they are still willing to help.
Hopefully this will help someone in need and you will find your Angels of Mercy. I was lucky enough to have found some angels of mercy for my son. I will be eternally greatful for this and forever in their debt.
Saturday, February 21, 2009

Home Sweet Home Bundles


Bring that Home Sweet Home feeling into your home with one of our richly scented 10oz sqaure mason jar candles, a 3/pk of our richly scented melters, and a bar of our wonderful prairie prim soap.
You get all three for the sale price of 12.50!


For details see our website http://www.brandyannescandlesandprims.com/


Click on the Home Sweet Home button on the left side of the screen.

Easy Homemade Silky Bath Salts

Try this easy recipe for some inexpensive bath salts and treat yourself to a spa like bath!
Mix 1 cup Epsom Salts with 1 cup Instant Powdered Skim Milk. When these two ingredients are well blended add 10-20 drops of essential oil or skin safe Fragrance Oil. Mix well then store in a glass jar with a tight fitting lid. Use 1/4 cup per bath.
Enjoy!!

Surgery Went Well!

My son's surgery went well yesterday- although it was long- 4 1/2 hours- all the work could not be done because of how long it was- so he will have to go back for more surgery at a later date.
He had not had any surgery before so- his first words to me was- I want to go home- of course he went right back to sleep after that! Morphine will do that ! LOL
The doctor said that if he does well & walks a lot he may get to come home tomorrow!
It is such a relief for me to have this over with- the next time should be easier since they fixed the most crucial issues first. He should be leaving the Cardiac ICU today.
I want to thank all of you that gave me support this week with the two surgeries.

Prairie Wild Morning Glory

Prairie  Wild Morning Glory

Prairie Phlox

Prairie Phlox

Prairie Sundrops

Prairie Sundrops

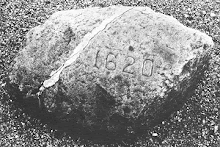
The Famous Rock!

The Famous Rock!
Plymouth Rock dated 1620

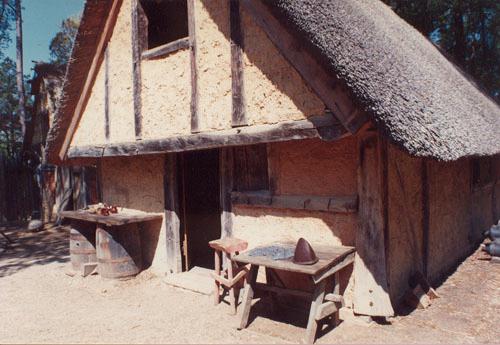
Plimoth Plantation

Plimoth Plantation
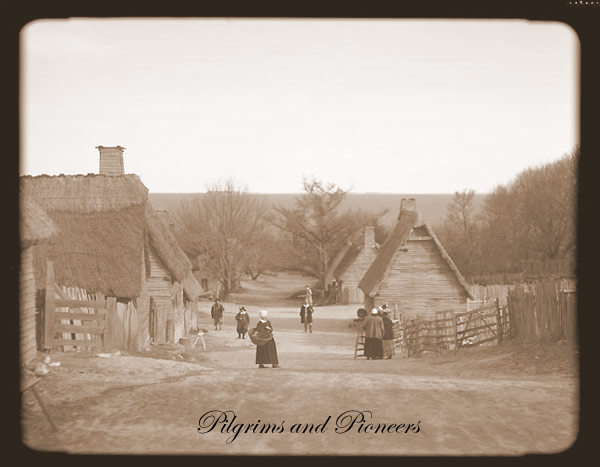
The Village

Plimoth Plantation

Plimoth Plantation
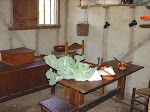
A Keeping Room