Tomorrow is my son's surgery day- of course once again I am nervous!
The surgery will take 3-5 hours and he will stay in the hospital for 5-7 days.
They are going to do the Peripheral Artery Bypass- stent the left kidney artery- and stent the Abdominal Aorta.
He has never had anything done medically so this will be a new experience for him.
With the hospital being so far away I will only be able to go visit once- probably Tuesday or Wednesday.
I am sure he will reach a point where he is bored & wants to come home- maybe not the first few days though- he may be pretty sore and medicated. Please say some prayers for him!
Thursday, February 19, 2009


Tuesday, February 17, 2009
A sigh of relief!
The surgery is over & went very well! Hubby is home I sound asleep right now!
My son's surgery is Friday morning at 9:am- after that I hope we are done for awhile!
My son's surgery is Friday morning at 9:am- after that I hope we are done for awhile!
The Day is Here
My husband has his gall bladder surgery today.
I am a little nervous this morning- his cardiologist said he should do fine but I worry about this lungs tolerating the anesthesia- he has CPOD.
The anestheseologist saw him Friday so has had plenty of time to pick the right drugs to use- I hope.
I will be gald when the surgery is over so I can take a big deep breath.
It looks like my son will be having his surgery in Peoria on Friday morning. I will be glad when we have made it through that one too!
I am a little nervous this morning- his cardiologist said he should do fine but I worry about this lungs tolerating the anesthesia- he has CPOD.
The anestheseologist saw him Friday so has had plenty of time to pick the right drugs to use- I hope.
I will be gald when the surgery is over so I can take a big deep breath.
It looks like my son will be having his surgery in Peoria on Friday morning. I will be glad when we have made it through that one too!
Saturday, February 14, 2009
Happy Valentine's Day!
 Happy Valentine's Day!
The writing of special notes and letters for Valentine’s Day gained widespread popularity in the 1700s. At that time the romantic missives would have been handwritten, on ordinary writing paper.
Papers made especially for Valentine greetings began to be marketed in the 1820s, and their use became fashionable in both Britain and the United States. In the 1840s, when postal rates in Britain became standardized, commercially produced Valentine cards began to grow in popularity. The cards were flat paper sheets, often printed with colored illustrations and embossed borders. The sheets, when folded and sealed with wax, could be mailed.
Papers made especially for Valentine greetings began to be marketed in the 1820s, and their use became fashionable in both Britain and the United States. In the 1840s, when postal rates in Britain became standardized, commercially produced Valentine cards began to grow in popularity. The cards were flat paper sheets, often printed with colored illustrations and embossed borders. The sheets, when folded and sealed with wax, could be mailed.
Thursday, February 12, 2009
And The Winner Is.......
Karen from Georgia! Hubby & Molly drew your name tonight! Congrats Karen!
I want to thank everyone the participated! Stay tuned to my blog as there will be more contest coming!
I want to thank everyone the participated! Stay tuned to my blog as there will be more contest coming!
Wednesday, February 11, 2009
Happy Birthday Honest Abe!
Our 16th and most famous President will turn 200 tomorrow.
Abe Lincoln was born February 12,1809 in Hardin Co., KY.
He married Mary Todd in Springfield , Il on November 4,1842.
He was asas sinated on April 14, 1865 at the Ford Theater in Washington,D.C.
by John Wilkes Booth.
To learn more about Abraham Lincoln go to
http://lincoln.lib.niu.edu/

Abe Lincoln was born February 12,1809 in Hardin Co., KY.
He married Mary Todd in Springfield , Il on November 4,1842.
He was asas
 sinated on April 14, 1865 at the Ford Theater in Washington,D.C.
by John Wilkes Booth.
To learn more about Abraham Lincoln go to
http://lincoln.lib.niu.edu/

Friday, February 6, 2009
Happy Birthday Ronald Reagan

Ronald Reagan was born in an apartment above the local bank building in Tampico, Illinois on February 6, 1911 to John "Jack" Reagan and Nelle Wilson Reagan. Tampico is a small town about 15 miles from my home & is where most of my family ancestors are from.
As a boy, Reagan's father nicknamed him "Dutch," due to his "fat little Dutchman"-like appearance, and his "Dutchboy" haircut; the nickname stuck with Ronald throughout his youth. Reagan's family briefly lived in several towns and cities in Illinois, including Monmouth, Galesburg and Chicago, until 1919, when they returned to Tampico and lived above the H.C. Pitney Variety Store.After his election as president, residing in the upstairs White House private quarters, Reagan would quip that he was "living above the store again."
As a boy, Reagan's father nicknamed him "Dutch," due to his "fat little Dutchman"-like appearance, and his "Dutchboy" haircut; the nickname stuck with Ronald throughout his youth. Reagan's family briefly lived in several towns and cities in Illinois, including Monmouth, Galesburg and Chicago, until 1919, when they returned to Tampico and lived above the H.C. Pitney Variety Store.After his election as president, residing in the upstairs White House private quarters, Reagan would quip that he was "living above the store again."
Friday, January 30, 2009
Piecing a Heart Block
If you want to make a Valentine quilt or table topper try piecing some heart blocks!
Scroll to the bottom to see the pieced heart.
Cutting the fabricThis Block requires:
one 6-1/2" x 3-1/2" of focus fabric
two 3-1/2" squares of focus fabric
two 3 1/2" squares of the background fabric
four 2" squares of background fabric
Piecing the Block
1) Lightly mark a diagonal line on the wrong side of the two 3-1/2" background fabric squares and the four 2" background fabric squares as shown.
2) Take the 6-1/2" x 3-1/2" rectangle of focus fabric and place one of the 3 1/2" squares of background fabric on the rectangle as shown, right sides together. Sew on the diagonal line marked on the 3-1/2" background fabric square.
3) Trim fabric 1/4" from the sewn diagonal line as shown. Press seam toward the background fabric.
4) Take the remaining 3-1/2" square of background fabric and place on top of the unit completed in Step 2 as shown with right sides together. Sew on the diagonal line marked on the 3-1/2" background fabric square.
5) Trim fabric 1/4" from the sewn diagonal line as shown. Press seam toward the background fabric. The completed units should measure 6-1/2" x 3-12/2".
6) Take one of the 2" squares of background fabric and place on top of one of the 3-1/2" squares of focus fabric as shown with right sides together. Sew on the diagonal line marked on the 2" background fabric square. Repeat with the remaining 3-1/2" square of focus fabric and one of the 2" squares of background fabric.
) Trim fabric 1/4" from the sewn diagonal line as shown. Press seam toward the background fabric.
8) Take one of the 2" squares of background fabric and place on top of one of the units completed in Step 7 as shown with right sides together. Sew on the diagonal line marked on the 2" background fabric square. Repeat with the remaining Step 7 unit and the remining 2" square of background fabric.
9) Trim fabric 1/4" from the sewn diagonal line as shown. Press seam toward the background fabric. This completed unit should measure 3-1/2" square.
10) Piece together the two units created in Step 9 as shown. Press the seam allowance to either side. This finished unit should measure 6-1/2" x 3-1/2".
11) Piece together the unit created in Step 5 with the unit created in Step 10 to complete the heart Block. The finished Block should measure 6-1/2" x 6-1/2" which includes a 1/4" seam allowance on all sides.
Scroll to the bottom to see the pieced heart.
Cutting the fabricThis Block requires:
one 6-1/2" x 3-1/2" of focus fabric
two 3-1/2" squares of focus fabric
two 3 1/2" squares of the background fabric
four 2" squares of background fabric
Piecing the Block
1) Lightly mark a diagonal line on the wrong side of the two 3-1/2" background fabric squares and the four 2" background fabric squares as shown.
2) Take the 6-1/2" x 3-1/2" rectangle of focus fabric and place one of the 3 1/2" squares of background fabric on the rectangle as shown, right sides together. Sew on the diagonal line marked on the 3-1/2" background fabric square.
3) Trim fabric 1/4" from the sewn diagonal line as shown. Press seam toward the background fabric.
4) Take the remaining 3-1/2" square of background fabric and place on top of the unit completed in Step 2 as shown with right sides together. Sew on the diagonal line marked on the 3-1/2" background fabric square.
5) Trim fabric 1/4" from the sewn diagonal line as shown. Press seam toward the background fabric. The completed units should measure 6-1/2" x 3-12/2".
6) Take one of the 2" squares of background fabric and place on top of one of the 3-1/2" squares of focus fabric as shown with right sides together. Sew on the diagonal line marked on the 2" background fabric square. Repeat with the remaining 3-1/2" square of focus fabric and one of the 2" squares of background fabric.
) Trim fabric 1/4" from the sewn diagonal line as shown. Press seam toward the background fabric.
8) Take one of the 2" squares of background fabric and place on top of one of the units completed in Step 7 as shown with right sides together. Sew on the diagonal line marked on the 2" background fabric square. Repeat with the remaining Step 7 unit and the remining 2" square of background fabric.
9) Trim fabric 1/4" from the sewn diagonal line as shown. Press seam toward the background fabric. This completed unit should measure 3-1/2" square.
10) Piece together the two units created in Step 9 as shown. Press the seam allowance to either side. This finished unit should measure 6-1/2" x 3-1/2".
11) Piece together the unit created in Step 5 with the unit created in Step 10 to complete the heart Block. The finished Block should measure 6-1/2" x 6-1/2" which includes a 1/4" seam allowance on all sides.
This would look great in traditional red fabrics but would also look great in pinks or mauves.

Thursday, January 29, 2009
So many new friends!
I am so delighted with all of the new friends that have visited my blog! There have even been two that live near Pliloth Plantation! Now you know that makes me so envious!
I am very busy with doctor appointments for my husband & son so I have not been able to comment but I have read each & everyone and appreciate them so much!
I am very busy with doctor appointments for my husband & son so I have not been able to comment but I have read each & everyone and appreciate them so much!
Sunday, January 25, 2009
One World One Heart Blog Giveaway


I am participating in the One World One heart blog Giveaway.
This a huge blog event- at last count there are over 500 participants!
Click on the logo to the right to view more blogs!
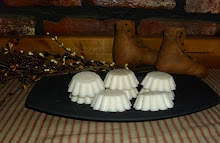
I will be giving away Prairie Prim Soap balls & a 3/pk of Country Cabin tarts/melters as shown above.
To be entered just leave a comment telling me what your favorite candle/soap scent is!
If you do not have a blog make sure you leave your email address so I can contact you if you win.
Comments will be taken until 11:59 pm on February 11th.
Winner will be drawn at 7:00 pm on February 12th.
Good Luck!
Saturday, January 24, 2009
4 Patch Quilt Block

What You Need
2 strips cut 31/2" x 7 "
Place dark strip onto light strip. Right sides together. Edges even. Stitch using a scant ¼" seam allowance.
Press seam toward dark strip.
Place sewn strips on cutting mat. Rotary cut in half.
Each unit should measure 3 ½" x 6 ½".
Arrange units so you have a dark square & a light square.
Place units on top of each other so that you have a dark square on top of a light sqaure & a light sqaure on top of a dark square.
Make sure right sides are together. Edges even. Pin the center seams so the folds meet. Stitch.
Your quilt block should resemble a checker board and should measure 61/2" x 61/2"
2 strips cut 31/2" x 7 "
Place dark strip onto light strip. Right sides together. Edges even. Stitch using a scant ¼" seam allowance.
Press seam toward dark strip.
Place sewn strips on cutting mat. Rotary cut in half.
Each unit should measure 3 ½" x 6 ½".
Arrange units so you have a dark square & a light square.
Place units on top of each other so that you have a dark square on top of a light sqaure & a light sqaure on top of a dark square.
Make sure right sides are together. Edges even. Pin the center seams so the folds meet. Stitch.
Your quilt block should resemble a checker board and should measure 61/2" x 61/2"
Thursday, January 22, 2009
Surgery for Son, Surgery for Husband, But doing the Happy Dance
Let me explain this a bit! I am doing the happy dance because these problems are going to be fixed!
My husband needs his gall bladder removed- has to see his cardiologist & a lung specialist first to make sure he can tolerate the anesthesia- if they give their okay he will be minus a gall bladder full of stones! And that will be a good thing!
My son discovered he has several blocked arteries- abdomen, kidney artery, and iliac artery that supplies blood to his left leg.
The surgeon he saw here found out he did not have medical insurance and said come back & see me when you have at least 20,000 dollars.
Not having this done would have led to a leg amputation or worse for my son- he is only in his thirties.
I contacted a hospital in a big city 80 miles away from us. He saw one of their vascular surgeoans today- he is going to have his heart arteries checked, and the carotid arteries in his neck and fix everything that needs to be fixed at one time if possible- also they are going to try to find out why this is happening at such a young age
They are truly angels there! So there fore I am doing the happy dance since both of my loved ones will hopefully soon be well.
My husband needs his gall bladder removed- has to see his cardiologist & a lung specialist first to make sure he can tolerate the anesthesia- if they give their okay he will be minus a gall bladder full of stones! And that will be a good thing!
My son discovered he has several blocked arteries- abdomen, kidney artery, and iliac artery that supplies blood to his left leg.
The surgeon he saw here found out he did not have medical insurance and said come back & see me when you have at least 20,000 dollars.
Not having this done would have led to a leg amputation or worse for my son- he is only in his thirties.
I contacted a hospital in a big city 80 miles away from us. He saw one of their vascular surgeoans today- he is going to have his heart arteries checked, and the carotid arteries in his neck and fix everything that needs to be fixed at one time if possible- also they are going to try to find out why this is happening at such a young age
They are truly angels there! So there fore I am doing the happy dance since both of my loved ones will hopefully soon be well.
The Log Cabin Block


Choose a color or fabric for your center square in the blocks. These can be the traditional red or toss tradition out the window and pick a bold color (or several colors). You might want to "fussy cut" an image from a novelty fabric for the center. For the center you will cut total length of strips 3.5 inches wide. Or if you are using odd sized scraps cut the number of squares of 3.5 x 3.5 inches to match the number of blocks you plan to make. Put these aside.
Start cutting 2 inch strips from the various fabrics you will use for your blocks. As you cut them sort them into two groups by either contrast (light - dark) or into color families if you choose to do so. If your fabric is full width your strips will be 2 in. x 42", but if your fabric is in odd sizes you will have 2" x assorted lengths and that is fine, too. You need not cut all the strips at once, but cut a variety so you can sew 1-2 blocks to test.
Sew a fabric strip with a 1/4 inch seam allowance to the center square- trim even.
Then add a strip to the other three sides- continue sewing & trimming until you have a 12" block keeping your light fabrics on one side & your dark fabrics on the other.
A diagram is on the upper right side of this post
Tuesday, January 20, 2009
Quilt Block Projects
It occured to me that if you have never made a quilt- a full quilt might be intimidating- or perhaps you do not have enough fabric on hand to make a lot of blocks in one color.
You can make each block out of different fabric for a scrappy look- these are usually quite wonderful!
One block can be a pillow top- or a tote bag front.
Three blocks can be a table runner.
Six blocks can be a doll quilt or a wall hanging.
Try using up scraps out of your stash like the pioneer women would have for some no cost decorating!
You can make each block out of different fabric for a scrappy look- these are usually quite wonderful!
One block can be a pillow top- or a tote bag front.
Three blocks can be a table runner.
Six blocks can be a doll quilt or a wall hanging.
Try using up scraps out of your stash like the pioneer women would have for some no cost decorating!
Let's Quilt!

Since quilting was such a big part of the lives of Pioneer woman I have decided to post some free patterns for quilt blocks that have been around for a very long time- many of them back to Pioneer days.
I will try to post easy blocks so that it will be easier to get a quilt finished.
The first block is : Ohio Star.
Cutting Instructions:Cream... 4 squares 4 1/2" x 4 1/2"... 2 squares 5 1/4" x 5 1/4", cut twice diagonally to make quarter-square triangles - yield: 8Blue print... 1 square 4 1/2" x 4 1/2"Red... ... 2 squares 5 1/4" x 5 1/4", cut twice diagonally to make quarter-square triangles - yield: 8
Size: 12" FinishedBeginner Level
Assembly Instructions:1. Referring to Diagram I, make 4 pieced-square sub units.
2. Referring to Assembly Diagram, sew pieced-squares to 4 1/2" x 4 1/2" cream and blue print squares. Sew rows together to make Ohio Star Block.
I will try to post easy blocks so that it will be easier to get a quilt finished.
The first block is : Ohio Star.
Cutting Instructions:Cream... 4 squares 4 1/2" x 4 1/2"... 2 squares 5 1/4" x 5 1/4", cut twice diagonally to make quarter-square triangles - yield: 8Blue print... 1 square 4 1/2" x 4 1/2"Red... ... 2 squares 5 1/4" x 5 1/4", cut twice diagonally to make quarter-square triangles - yield: 8
Size: 12" FinishedBeginner Level
Assembly Instructions:1. Referring to Diagram I, make 4 pieced-square sub units.
2. Referring to Assembly Diagram, sew pieced-squares to 4 1/2" x 4 1/2" cream and blue print squares. Sew rows together to make Ohio Star Block.
Note the borders on this block & squares in the corners are not included in the directions.
Subscribe to:
Posts (Atom)
Prairie Wild Morning Glory

Prairie Phlox

Prairie Sundrops

The Famous Rock!
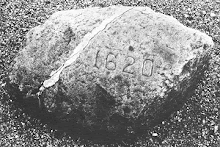
Plymouth Rock dated 1620
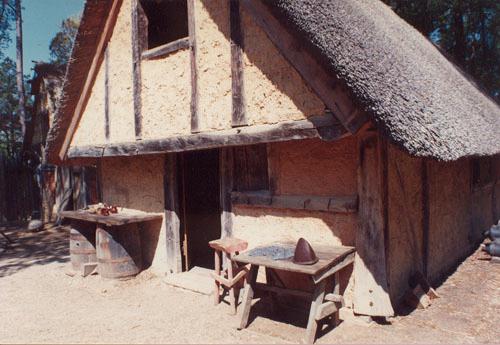
Plimoth Plantation
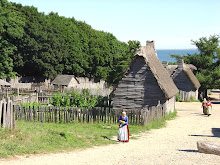
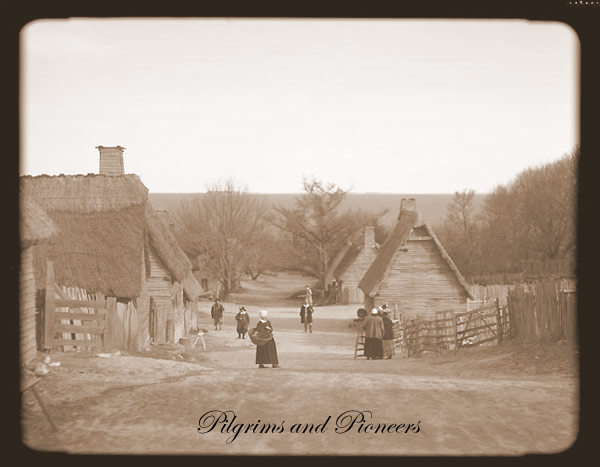
The Village
Plimoth Plantation

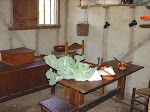
A Keeping Room